Sunday, August 17, 2014

DIY LARGE DOG BED

I had been scouring the internet for weeks trying to find a dog bed that was fairly large, washable, and not expensive.  I had no luck!  Most beds ranged from $50 to over $100 for the large size, some of those not even washable! 

Then one day it dawned on me!  Why can't I just make it myself!?!  So that is just what I did.  I realized after looking I had everything I needed except for a zipper.  So really this project only cost me $1.77 plus tax!!

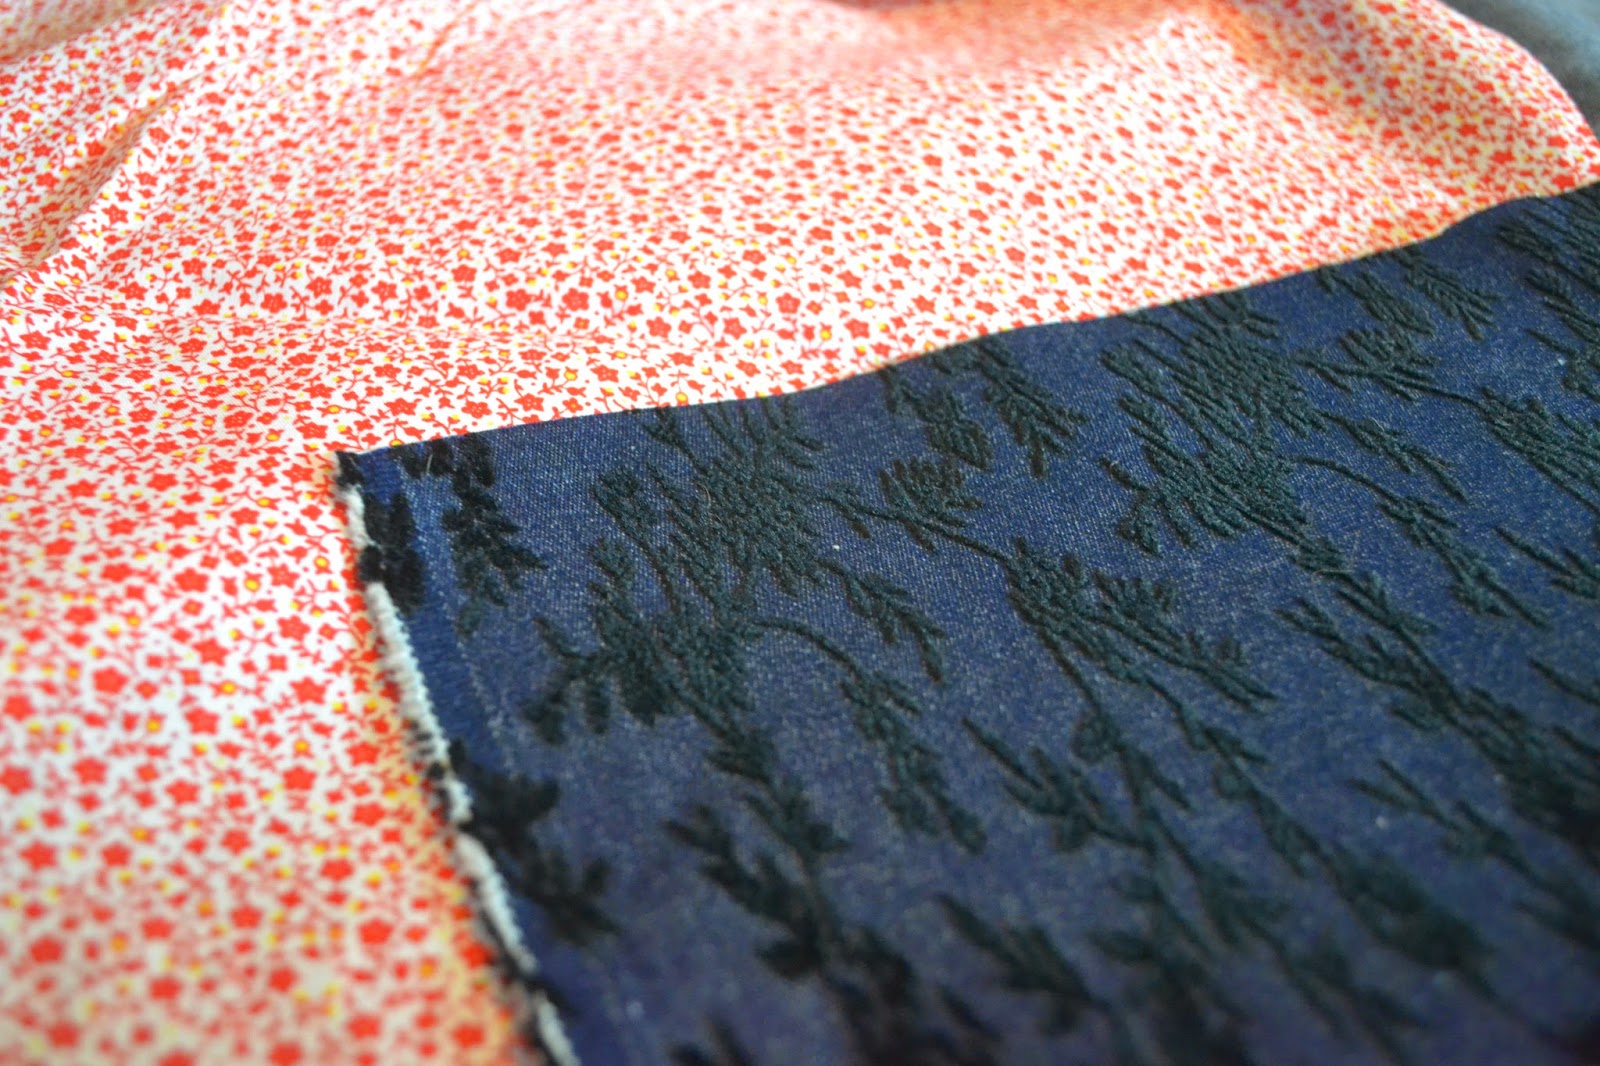
I started out with two large pieces of fabric I had in my stash.  I picked a dark color for the bottom and found a top piece that matched the colors in our living room. :) 


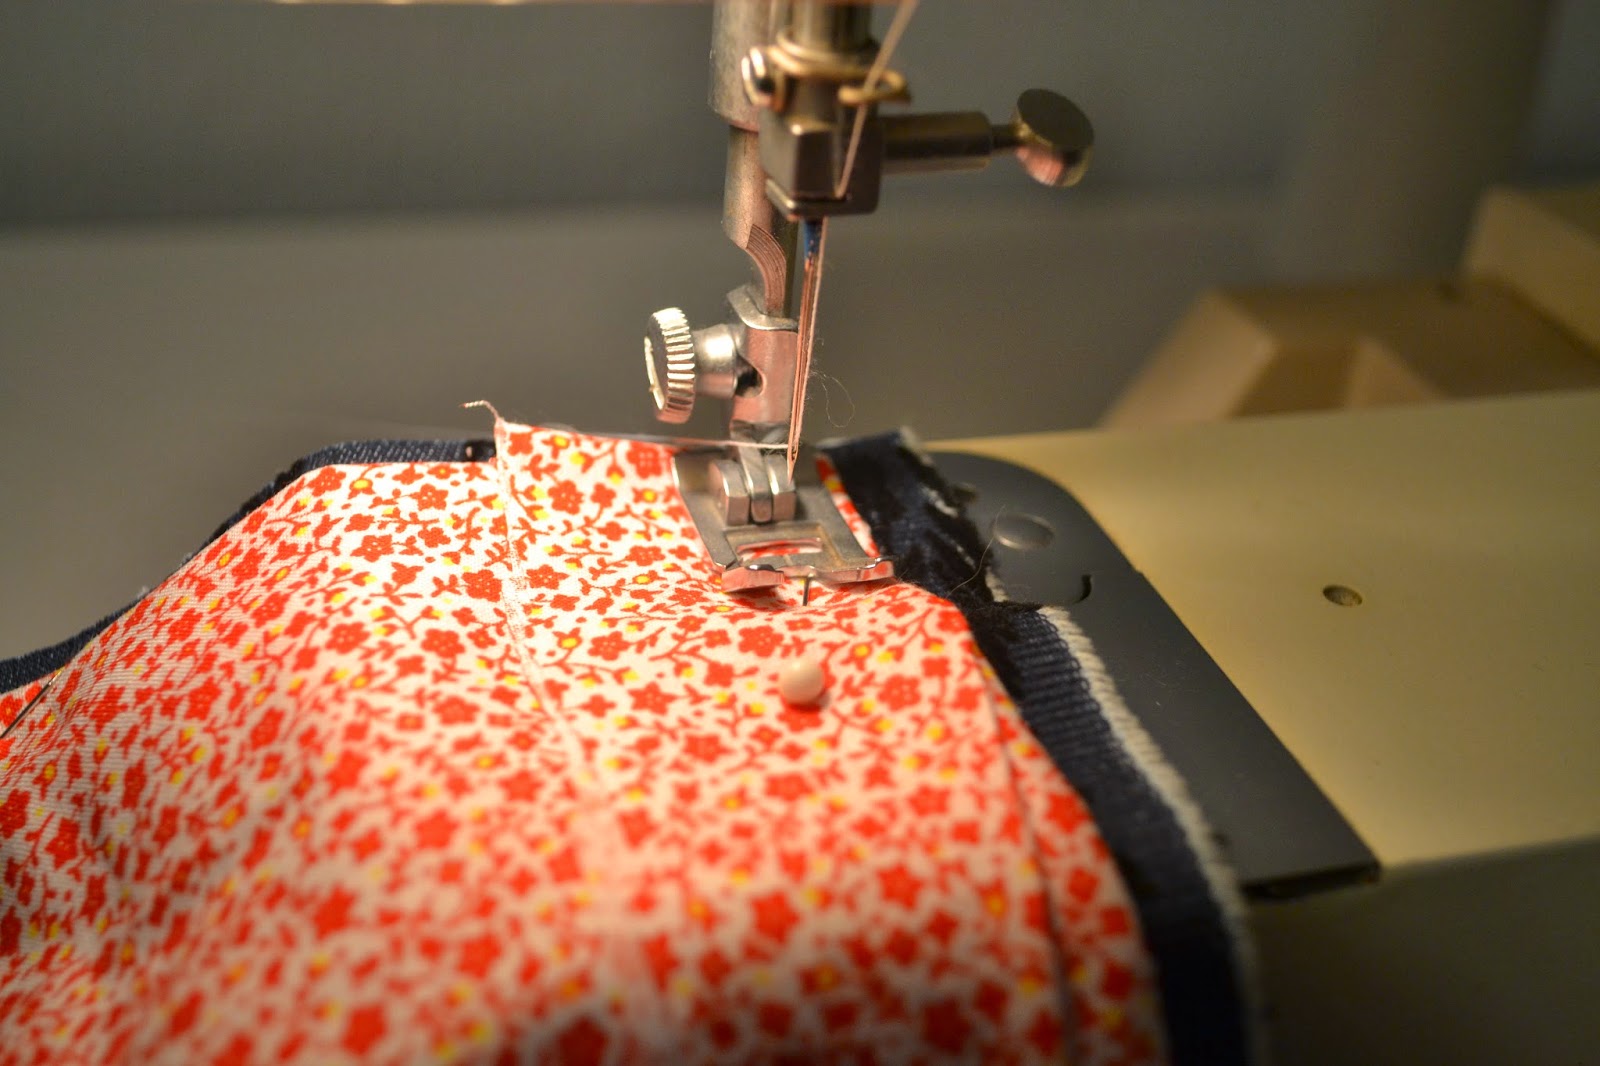
Next I laid both pieces out and cut them to approximately the same size.  I laid them so that I would be sewing the bed inside out, with the decorative sides against each other.  I used stick pins to keep each of the sides in place.


I pinned my zipper in place on one of the small sides.  I wanted to be able to remove the items inside so that I could wash them along with the bed cover.


Here is what I had after everything was pinned.  It turned out to be bigger than I expected, but works great!  I didn't measure when putting the pieces together.  I just went by how big my pieces were already and shaped them up to be about the same size.  When pinning, I just eye balled it to get the sides straight.  I knew once I turned it inside right and stuffed it you wouldn't be able to tell if I was off a little.


Next came the sewing part.  I have done very little sewing machine work without the help of my mom, so I was pretty proud of this project.  I got everything set up and just went for it!  (I know it doesn't look like it is still inside out here, but it is.  I just had excess fabric I folded over rather than cutting off.)


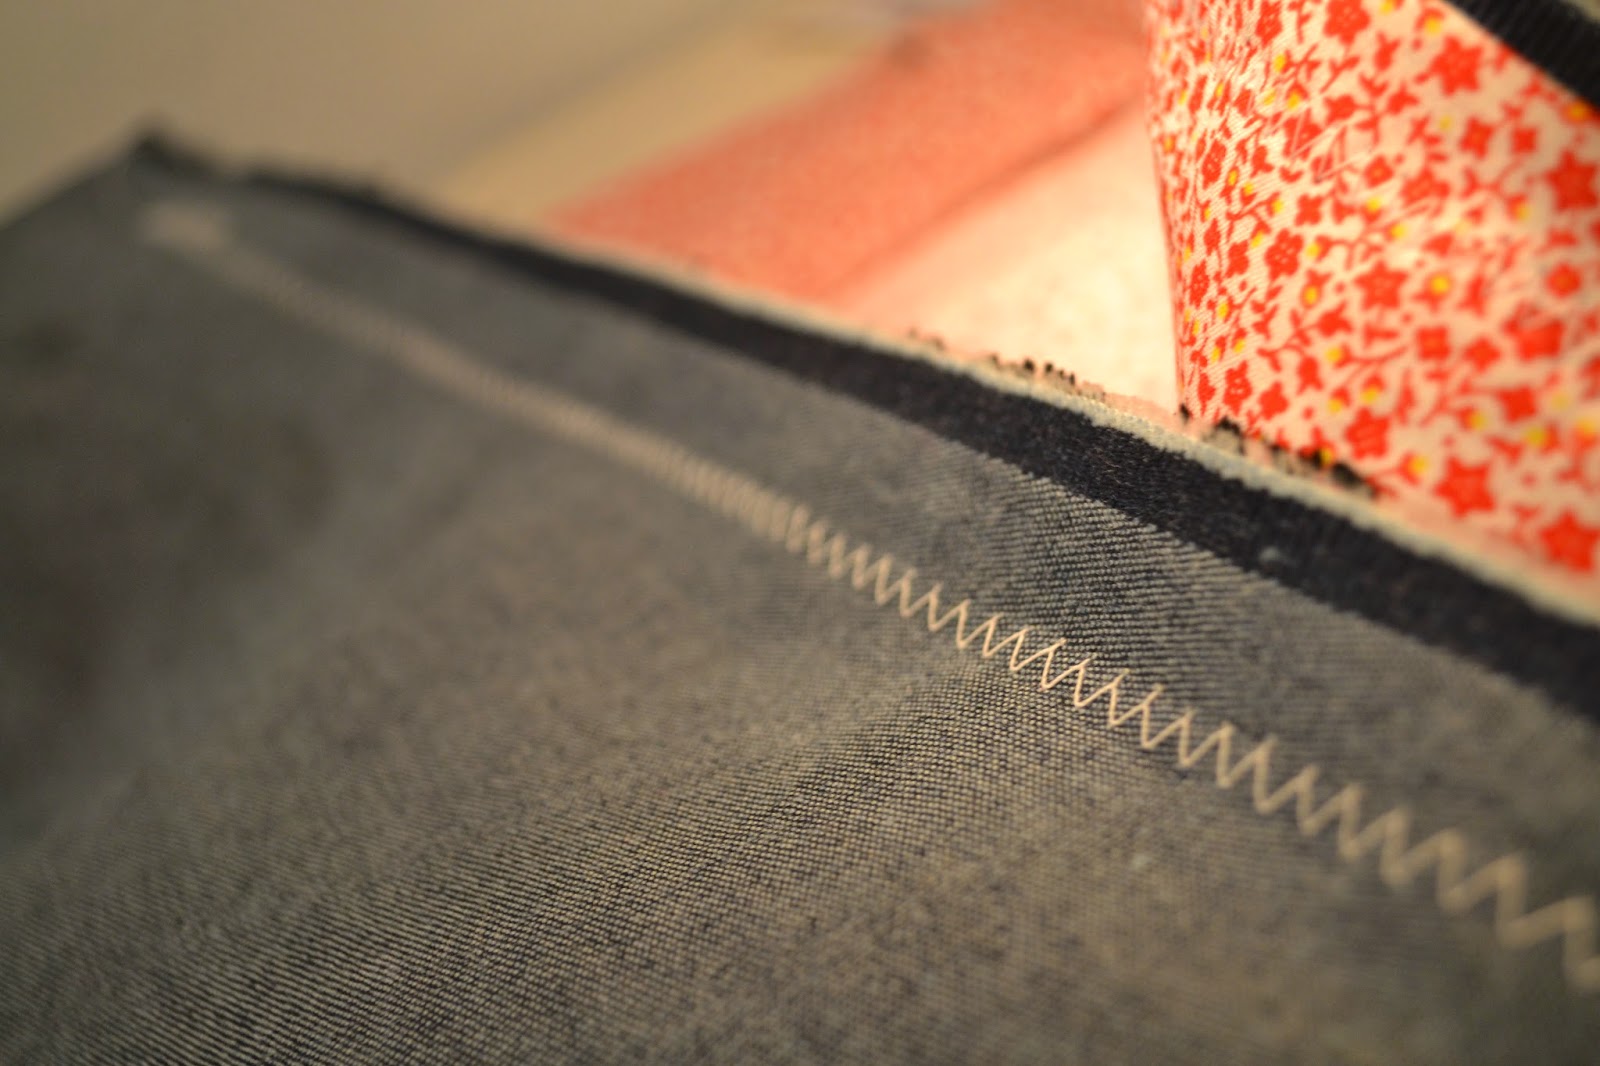
I used the zigzag pattern setting on the sewing machine for the thread.  I thought this might be a little more durable since it was going to be a dog bed. 


Next came the zipper.  I admit I have not installed a zipper on anything before this!  So I kinda winged this part.  I am sure there are better and more proper ways than my method.  However, all I did was to sew the zipper as close as I could to the edge, attaching it to both fabrics.  I will admit my method left small holes on each side because I sewed the zipper after sewing the fabrics to each other on both sides of the zipper.  If I had to do over I would sew the zipper in first so that I could be sure to have enough room to sew the whole zipper to the fabric.  (Hope this makes sense)


Once I had the zipper attached, I turned the fabric inside right. Here is what I had made!


I stuffed the cover with extra pillows and blankets that could be washed.  Here is the finished product!


 "Please with the camera, I am trying to sleep" :) 


Hope this was helpful.  It was a lot of fun to make and has got me looking into more sewing projects! 
Sunday, August 10, 2014

GO BIG BLUE! DIY UK Burlap Wreath

Today was a rainy, crafty mood kinda day.  My mom had asked me to make her an UK wreath for her front door a few weeks ago.  She brought me some supplies and said do your thing.  I used what she brought me and added a little of my own.  Here is what I came up with......

First I painted the letters with some white acrylic paint.  


Next I wrapped a straw wreath with some blue with white polka dot burlap.  I left the plastic on the wreath to keep the straw from poking into the burlap.  I used a hot glue gun to secure the burlap, gluing after a few wraps to hold it still.  It took two rolls of the burlap to cover the wreath. 


Then I decided to add a burlap banner to the wreath to add another element.  I cut several triangles from some light color burlap I had on hand.


 I used a Sharpie to free hand the letters on each triangle to spell "GO CATS". 


After getting the letters on the triangles, I decided I would like for the black to be more saturated.  So, I used some acrylic black paint I had on hand to trace over each letter with a brush.


I used some fishing line to attach each triangle to create the banner.  I used three dots of hot glue at the top of each triangle.


Lastly, I attached the "UK" letters and the banners to the wreath using...you guessed it...hot glue.  Here is the finished product....


Sunday, August 3, 2014

Nail Art Creations

Hey!  It's been awhile I know....seems like this summer has been extremely busy!

One thing I have been enjoying this summer is nail art!  I have always been into painting my nails and doing manis, but have gotten a little more creative lately.  I ordered some dotting tools and striping tape awhile back and have been playing with ideas.  Below are just a few I wanted to share.....


I am going to continue practicing and will hopefully be able to do some harder designs soon....just in time for football season!  I already have some ideas to support my teams! :)

I hope you enjoyed these looks!  More to come soon!


Sunday, June 1, 2014

Mini Rue 21 Haul

My mom and I decided to do a little shopping Friday afternoon.  I love going shopping with her, she can always find the best deals!  Not to brag, but I think I am getting as good as her!  Below are my bargain finds....

Yellow with Blue Polka Dots Dress (belt included)  - My first clearance find to match the chunky necklace I found and loved.  This dress cost a whopping $7.00.  The original price was $16.99, so not too bad! 


Chunky Blue and Gold Necklace - I wanted to get into the chunky necklace fashion trend...but the problem was I didn't own any chunky necklaces.  I found this necklace on clearance for $2.00!!  I was going to make some myself, but when I found this I decided this was the way to go!  The original price was $12.98!  Super proud of my savings here! 


Ombre Cream and Light Turquoise Top (belt included) - I found this top to go with my other chunky necklace find.  I love how it has the ombre effect.  I figure I can wear this with jeans or leggings. This top was on clearance for $6.49.  The original price was $12.99.  Great for summer! 


Chunky Light Turquoise with Gold Chain Necklace - Another cheap chunky necklace find!  I love the light turquoise color and thought it paired so well with the top above!  I got this one for $2.00 as well.  The original price was $8.98. I am not sure I like the big gold chain yet.  But if not I can easily remove this and just have the row of stones.


Skull Socks - Total random find!  I found these hanging on the $2.00 clearance rack and couldn't resist.  I like the different colors and skulls stitched in.  Original price here was $4.98.


Love Bracelet - I found this while checking out the necklaces and just thought it was cute.  It wasn't a very good bargain, but I couldn't pass it up.  The sale price was $2.00.  The original price was $3.98.  (But I LOVE the way the photo turned out!)


Cross Body Purse -  Although not on sale at all, I had to have this purse when I saw it.  Purses are one of my weaknesses!!  The price was $21.99.  However, I did find a coupon on my phone for $10.00 off, which basically made it half price and justified it's purchase. :)  If you have not downloaded the RetailMeNot app on your phone, go do it!  I have found so many coupons that actually work on this app! 


Hope you enjoyed my little haul!  I LOVE finding good deals! 

Monday, May 26, 2014

Going Back in Time....with Strawberry Preserves!!

This weekend I decided to try my hand at making some homemade strawberry preserves.  This homemade sweetness reminds of being a little kid.  I can remember eating this at home and at my grandparents' house.  So good!!!

I started off with the necessary ingredients....
  • strawberries
  • sugar
  • Sure Jell
I followed the instructions in the Sure Jell package for the "quick and easy" jam.  (I am not sure the difference in jam and preserves.  We just always called it preserves growing up.)  The recipe calls for 2 cups of strawberries (crushed, here I used my food processor on pulse), 4 cups of sugar, and one box of Sure Jell.  Believe me.....the recipe is definitely easy if I can do it. :)

This is what I ended up with.....

Once everything is mixed together and in appropriate containers, it must set for 24 hours.  After it sets, you can keep in the refrigerator for 3 weeks or freezer for one year!

Next came the taste test this morning....
  

The result was DELICIOUSNESS!!!  Tastes just like it did when I was little!

I can take a small trip down memory lane each time I bite into a biscuit with some homemade strawberry preserves (or jam whichever you prefer to call it). :)   

Anyone else have a food that just transports you back to when you were little?

Friday, May 23, 2014

Olay Professional Pro X Facial Cleaning Brush....Help Me!

I have been battling hormonal and normal breakouts for awhile now.  It only continues to get worse no matter what I have tried.  This includes a number of cleansers, moisturizers, and acne spot treatments.  I have been specifically annoyed by the painful, under the skin hormonal breakouts that never come to the surface.  I have been experiencing these mostly on my chin and forehead. 

I have seen many YouTubers talk about the Clarisonic.  Not to sound too cheap, but the least expensive one was still $99!  I didn't want to invest that much money in something that I wasn't sure was going to give me the results I wanted.  

I decided to go with the Olay Professional Pro X brush, which is very comparable to the Clarisonic.  The Pro X has two speeds and is waterproof so that you can use it in the shower as well.  I purchased this from Walmart for $21.97.  It has a 4.5 rating out of 5 from 399 reviews. 

I used it for the first time today.  Before using, I used a make up wipe and my regular facial cleanser using my hands as normal.  Then I used the Olay Professional Pro X with the cleanser that came in the package for 60 seconds.  This is the make up that was still on face after my normal routine.....
Even after only one use, I have to say I am impressed!!  I hope that this helps my breakouts and my face will clear up soon!  I was shocked at the make up still on face after two washes!!

Anyone else use a electric facial brush as part of your daily routine?  If so, what do you use and how has it helped?

Sunday, May 18, 2014

My Nail Favorites!!


I am absolutely obsessed with keeping my nails painted lately!!  I believe this is due to the products I have been using recently and loving! 

Orly Bonder Rubberized Base Coat - I bought this not knowing anything about this brand or how it had held up in reviews....but I have been impressed!  It does have a rubberized feel once it dries and seems to help my polish last longer than normal.  It retails for about $7.99.

Essie Nail Polish - I am not sure why it has taken me soooo long to give Essie polish a try...but I can honestly say it is my new favorite!!  I love the coverage and how easily and evenly it paints on the nail.  The two colors I have are Cute as a Button and Bikini Teeny.  These retail for $8.00 a piece. 

OPI RapiDry Top Coat -  I will never buy another top coat again!  This stuff is amazing!  Not only does it do what it says and dries your nails within minutes but also gives the perfect shiny finish that protects your nail color.  It is literally the perfect top coat!  This retails for $11.99. 

Essie Apricot Cuticle Oil - I have been using this cuticle oil for about three weeks now and I can really tell a difference.  I have very dry cuticles, but now they look healthy like I have gotten a professional manicure!  Plus this stuff smells amazing!!  I normally apply every night as part of my bedtime routine.  It retails for $8.50
 

What are some of you nail favs?

Saturday, May 17, 2014

Capturing Her First Prom


I was honored to capture Hannah's first prom with her date and boyfriend Grant.  Even the pouring rain could not put a damper on this special day for these two!  And thankfully the rain literally stopped just in time for us to take pictures outside......wish granted!!!  


Tuesday, May 13, 2014

POP Goes the Blush!


For the first time in my life (I am pretty sure), I  have purchased a blush!  I know it's hard to believe.   I honestly had to take a second myself too when I realized.  But normally I always use whatever blush comes in the "free gift with purchase".

After seeing several beauty YouTubers rave about the Clinque Cheek Pop blushes, I decided to make a purchase....FINALLY!  Haha!

I decided to go with the color Cherry Pop.  It was a wise choice my friend!  The color is so pigmented and goes on so easily.   I love how you can control how much color.  It is great for those no make up look days when you want to look more natural and just have slight color in your cheeks.  But it also works with full face make up as well!!  I just apply a few more swipes and voila!

The packaging is also super cute!  I like how clear packaging allows you to see the color.  And the cute flower design is a definite plus!


What is your favorite blush? 

Sunday, May 11, 2014

Nothing Says Springtime Like a Flip Flop Wreath!

For Mother's Day I decided to make a flip flop wreath for my mother-in-law.  It was fairly easy and turned out great!  Below are the steps I took.....

I started out with a wire hanger, flip flops, foam pipe covering, flowers, hot glue gun, and glue sticks.
First, I took the wire hanger and bent it into the best circle I could.
Next, I covered the wire hanger with the foam pipe covering.  You can purchase this from a home improvement store, I got mine from Lowes.  This is difficult to do because the foam does not want to make a nice circle.  To help this, I cut small slits in the foam.
 Once I have the foam covering the wire hanger, I wrap the foam in ribbon.  Here I used two colors and types of ribbon.  I basically did this because I didn't have enough of one kind to cover the entire thing.
Now it is finally time to start putting on the flip flops!  I laid them out several different ways until I decided what I liked best.  I decided to alternate how the flip flop was turned and colors.
Here is what it looks like with all the flip flops in place (except for one which I decided to include toward the end).  I had originally thought about putting a bow in this open space on the bottom right, but then decided to use the one flip flop I had left over.
Next, I added some flowers and a small butterfly to add some pop to the wreath.
Here are the supplies I needed to make the butterfly.  A piece of square fabric, some wire, beads, and two eye pens. 
 I used one eye pen to wrap around the middle of the fabric once I had folded it down to make the wings on each side.  The I used the other eye pen for the beads I had chosen to make the body. Then I used some purple wire I had to make the antennas.  I hot glued the beads to the front of the eye pen and fabric making the wings.  I then hot glued the antennas to the back of the fabric.  This was the end result.
Lastly, I hot glued a couple of flowers and the butterfly on the wreath.  Here is the finished product!!